
Camera Settings for Ecommerce Product Photography
There is no single best camera preset for ecommerce product photography. Choose aperture from the depth of field the product needs, shutter speed from camera and subject stability, and ISO from the remaining brightness requirement; then set focus for the critical product detail and white balance for the actual lighting. A tripod and a stationary product give shutter speed more latitude, while handheld capture or movement makes a shorter exposure a higher priority.

Camera settings decision guide
Choose the first setting from the condition you cannot compromise, then use the remaining controls to reach the intended brightness without sacrificing the required sharpness, stability or acceptable noise. Focus and white balance are separate decisions tied to subject distance and lighting.
Deep or close product, stable camera
Prioritise aperture. Use the aperture needed for sufficient front-to-back sharpness rather than the highest f-number available.
Then: with a stationary product on a tripod, lengthen shutter time when possible before raising ISO.
Handheld capture or movement
Prioritise shutter speed. Use a shorter exposure when camera shake or subject motion is the tighter blur constraint.
Then: compensate with aperture, ISO or both within the depth-of-field and noise limits that remain acceptable.
Static product at a fixed distance
Use single autofocus or manual focus. Place focus on the product detail that must be sharp and keep the camera-to-product relationship stable.
Verify: the required product depth still falls within acceptable depth of field.
Changing subject-to-camera distance
Use continuous autofocus when reacquisition is needed. The focus mode follows distance change; it does not replace depth-of-field control.
Verify: the intended detail remains the acquired focus target throughout capture.
Stable, controlled lighting
Prioritise repeatable white balance. Custom white balance, a suitable preset or a Kelvin setting can remain consistent when the light remains consistent.
Verify: neutral tones and product colour remain consistent across the series.
Changing or mixed lighting
Reassess white balance as the illumination changes. Auto white balance can be convenient under changing light, but its correction can vary between frames.
Verify: do not treat one correction as universally valid when different light sources affect the scene.
Decision rule: constrain the setting tied to the least-negotiable requirement first. For exposure, adjust the other two controls around that constraint; use the lowest practical ISO that still satisfies the required aperture, shutter speed and image brightness.
The practical objective is an appropriately exposed product image with sufficient sharpness, controlled image noise and consistent colour rendering. Exposure is the first coordinated setting relationship to evaluate because aperture, shutter speed and ISO must be balanced against the capture conditions.
Table of Contents
Exposure Settings: Aperture, Shutter Speed and ISO
Exposure settings coordinate aperture, shutter speed and ISO, but the three controls do not affect the image in the same way.
Aperture controls the lens opening and shutter speed controls exposure time, so both change the amount of light captured; ISO changes recorded image brightness through amplification or related camera processing rather than changing the light entering the lens.
Their values are interdependent because changing one control can alter image brightness or require compensation with another while also affecting depth of field, camera-shake sensitivity or image noise.
A full exposure stop is a twofold change in light or recorded brightness: changing shutter time from 1/125 s to 1/250 s halves captured light, changing aperture from f/5.6 to f/8 also halves captured light, and doubling ISO from 100 to 200 raises recorded brightness by about one stop without increasing the light captured.
The comparison below maps each control to its direct exposure or brightness effect, its secondary image effect and the typical consequence of an adjustment.
For product photography, the relevant criteria are depth-of-field priority, stability or motion constraints, acceptable image noise and intended image brightness under the available light.

| Control | Direct exposure or brightness effect | Secondary image effect | Condition that changes the choice | Typical adjustment implication |
|---|---|---|---|---|
| Aperture | A wider lens opening admits more light; a narrower opening admits less. | Changes depth of field and therefore how much product depth can appear acceptably sharp. | Required product depth, camera-to-product relationship and available light. | Choosing a narrower aperture for greater depth of field reduces captured light, so a longer shutter speed or higher ISO may be needed to maintain the intended brightness. |
| Shutter speed | A longer exposure time captures more light; a shorter exposure time captures less. | Changes sensitivity to subject movement and camera shake. | Tripod support, camera stability and movement during capture. | A tripod-supported static product can permit a longer exposure time; when a shorter shutter speed is required, a wider aperture or higher ISO may compensate for the reduced light capture. |
| ISO | A higher ISO increases recorded brightness through amplification or related processing; a lower ISO reduces that amplification. | Higher ISO can increase visible image noise and reduce usable image detail, with the result depending on the camera. | Available light, aperture and shutter-speed constraints, camera support and acceptable image noise. | Increase ISO when the required aperture and shutter speed would otherwise leave the recorded image too dark; reduce ISO when sufficient captured light allows less amplification. |
Product depth can make depth of field the priority, while handheld capture or product movement can make shutter speed the tighter constraint.
A tripod gives a static product more latitude for a longer exposure time, which can reduce the need to raise ISO when available light is limited.
If stability cannot be increased, a shorter shutter speed may instead require a wider aperture, a higher ISO or both, with the choice determined by acceptable depth of field and image noise.
As a conditional starting-point scenario, a stationary product on a tripod can prioritise the aperture needed for sufficient product depth, keep ISO lower when captured light permits, and let shutter speed extend to achieve the intended brightness.
The same values should not simply be copied to a handheld capture because reduced stability can shift priority toward a shorter exposure time and require compensation elsewhere in the exposure settings.
Aperture and Depth of Field
Aperture is the adjustable lens opening, expressed as an f-number, that affects both light capture and depth of field.
A wider aperture uses a lower f-number and produces shallower depth of field, while a narrower aperture uses a higher f-number and increases the range that appears acceptably sharp.
For product photography, the practical implication is that aperture helps determine how much front-to-back product depth can remain within that acceptable sharpness range.
The useful aperture depends on product depth, camera-to-product distance and lens behaviour rather than f-number alone.
At the same aperture and focal length, focusing closer reduces depth of field, while focusing farther away increases it, so close product views can require more careful sharpness management.
Narrowing the aperture can extend depth of field, but very small apertures may introduce diffraction that reduces fine-detail sharpness, with the practical effect depending on the camera and lens.
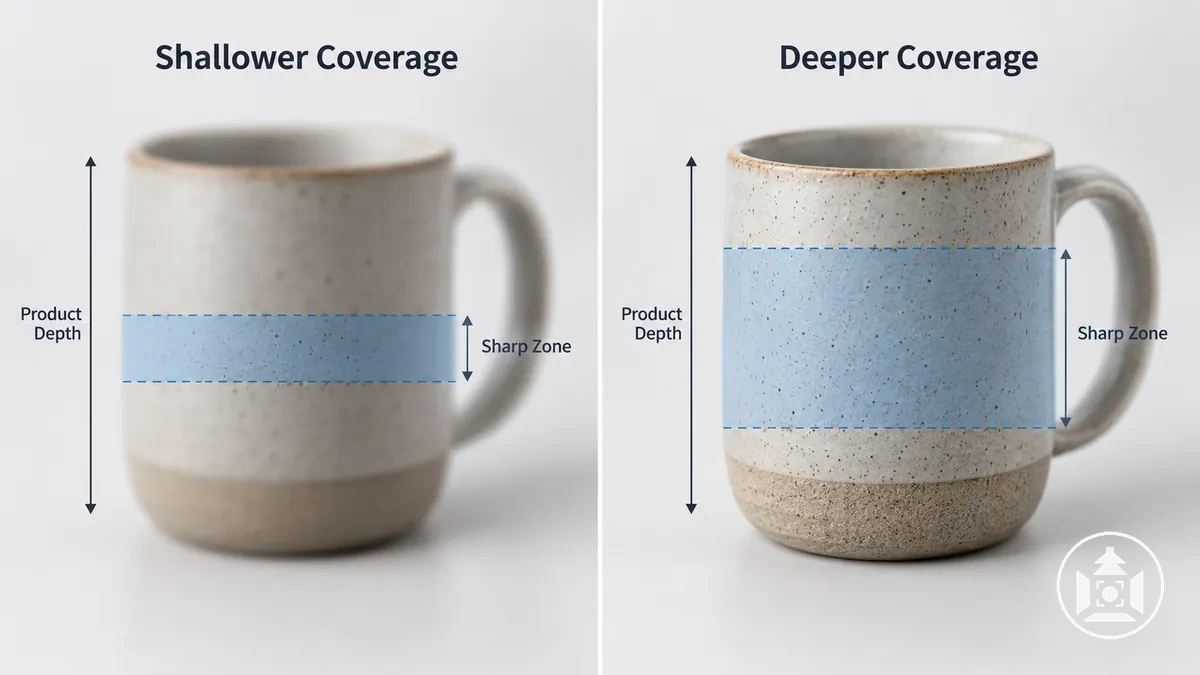
The image compares shallower and deeper sharp coverage across equivalent product geometry, making the relationship between aperture, product depth and front-to-back focus coverage visible without treating either condition as universally preferable.
- Product depth: A flatter product requires less front-to-back depth of field than a deep three-dimensional product, which may require a narrower aperture to extend acceptable sharpness across its depth.
- Camera-to-product distance: At the same aperture and focal length, a shorter focusing distance reduces depth of field, while a longer focusing distance increases the available sharp range.
- Desired separation: A wider aperture can provide shallower depth of field when separation outside the required product detail is useful, but it reduces the available sharp range across a deep product.
- Lens behaviour and diffraction: Narrowing the aperture increases depth of field, but very small apertures may reduce fine-detail sharpness through diffraction, so the highest available f-number is not automatically the appropriate choice.
A flatter product can therefore need less depth-of-field coverage, leaving more latitude for a wider aperture, whereas a deep three-dimensional product may require a narrower aperture to keep more of its front-to-back detail acceptably sharp.
Aperture should be selected for the required sharp coverage and capture geometry rather than simply pushed to the highest f-number.
Shutter Speed and Camera Stability
Shutter speed controls exposure time: a slower shutter keeps the exposure open for longer, while a faster shutter shortens the duration.
Longer exposure time increases the opportunity for camera shake or subject movement to affect the recorded image, so the practical shutter speed depends on camera stability and movement during capture.
A tripod supporting a static product permits more latitude for slower shutter speeds than a handheld or movement-prone setup.
The comparison below separates the main conditions that determine how much exposure time is practical and how each condition changes blur risk.
Handheld limits are not fixed because focal length and image stabilization can change how readily camera movement becomes visible.
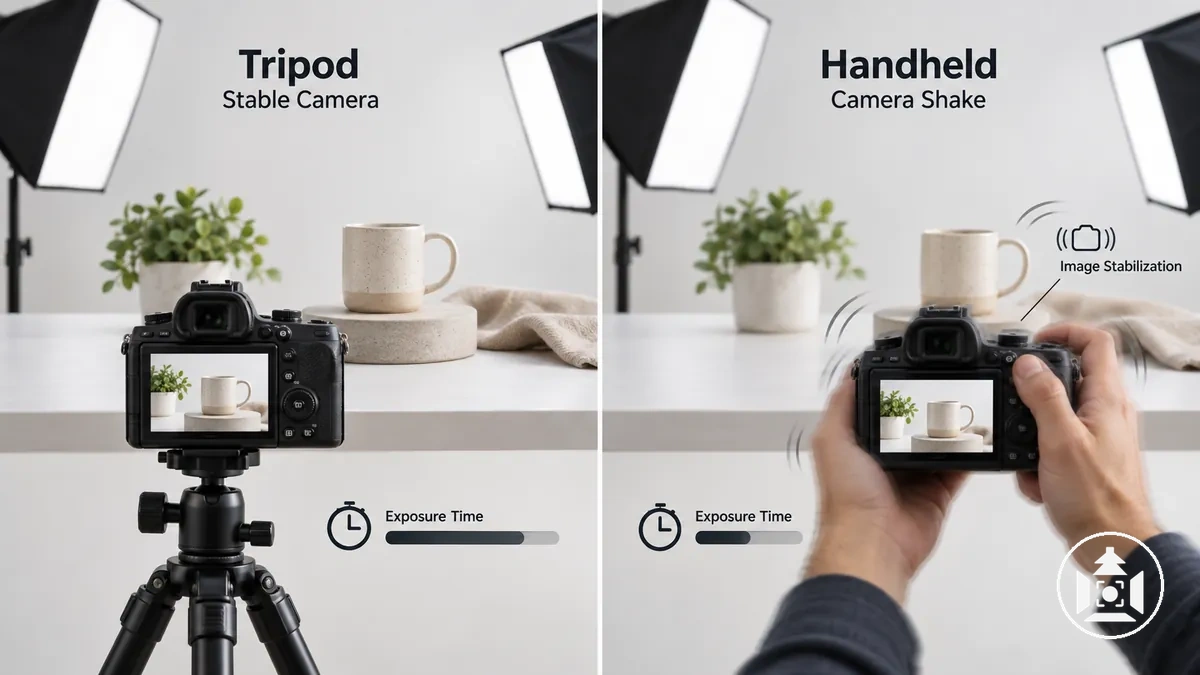
- Tripod-supported static product: Stable support and a stationary subject allow greater freedom to use a slower shutter speed because camera movement is constrained, although movement elsewhere in the setup can still affect the image.
- Handheld: Hand movement increases camera-shake risk as exposure time becomes longer, so a faster shutter speed may be practical when the camera cannot be stabilised.
- Subject movement: Movement during the exposure can produce motion blur even when the camera is on a tripod, making a shorter exposure time more important when the product or another recorded element is moving.
- Image stabilization and focal length: Image stabilization can reduce blur caused by some forms of camera movement, while longer focal lengths can make camera shake more apparent; neither establishes one universal minimum shutter speed or prevents blur caused by subject movement.
For example, a locked-off camera on a tripod photographing a stationary product can use a slower shutter speed when nothing moves during the exposure, whereas the same exposure time may carry greater blur risk when the camera is handheld.
Shutter speed is only one possible contributor to an unsharp image, so broader checks belong in guidance on why ecommerce product photos look blurry rather than in this camera-setting subsection.
ISO and Image Noise
ISO changes recorded brightness through signal amplification or related camera processing rather than increasing the amount of light entering the camera.
A higher ISO can make the recorded image brighter when aperture or shutter speed cannot provide the required result through light capture alone, but the additional amplification may make image noise more visible or reduce retained detail.
The practical effect depends on camera performance and exposure conditions, so neither a low ISO nor a higher ISO represents one universally correct setting.
ISO choice therefore depends on the available light, required shutter speed, camera support and the camera's noise performance.
Controlled light and stable support can provide enough captured light to use a low ISO, while limited available light or a shutter-speed constraint may justify a higher ISO to obtain the required recorded brightness.
The amount of visible image noise and retained detail at a given ISO can differ between cameras, so a fixed ISO value cannot define the same usable image quality for every camera.
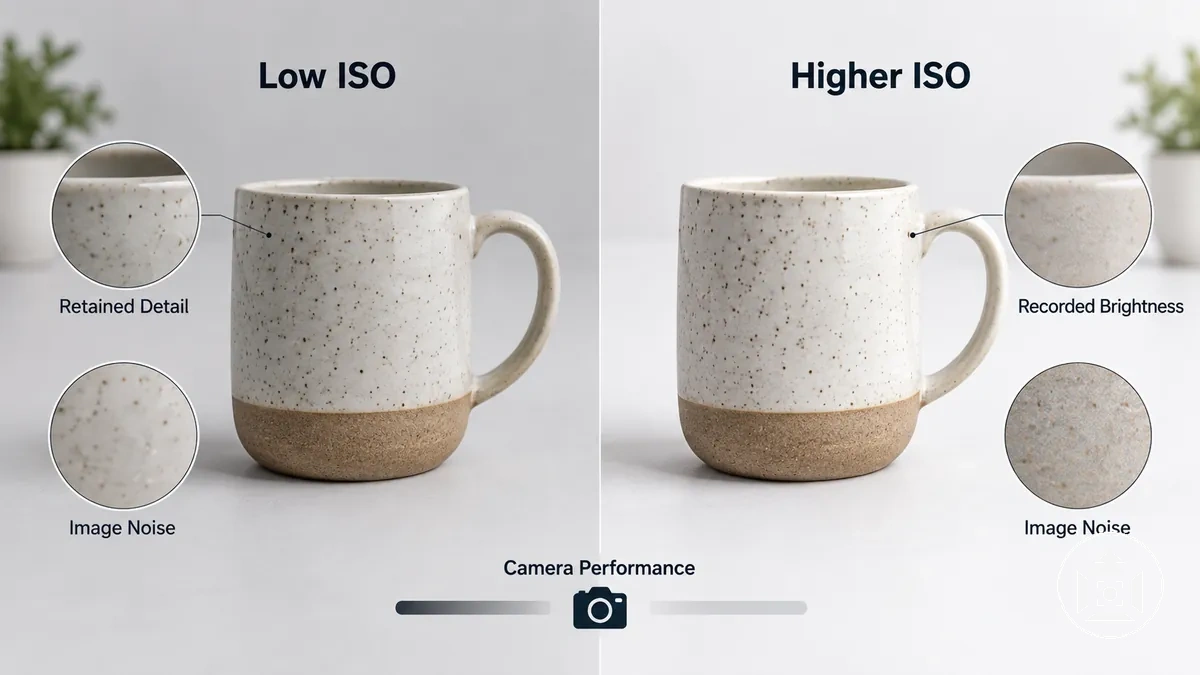
The image illustrates the general recorded-brightness and noise trade-off between lower and higher ISO conditions rather than a universal noise threshold.
- Available light: When sufficient light is captured for the required image brightness, a low ISO can limit the amount of amplification needed; less available light can make a higher ISO useful when other capture settings cannot be changed appropriately.
- Shutter-speed requirement: When the capture condition requires a shorter shutter speed, raising ISO can provide additional recorded brightness without increasing the exposure time.
- Camera support: Stable support can permit capture conditions that reduce the need for higher ISO, while a less stable situation may constrain exposure time and make additional ISO amplification practical.
- Camera-specific noise performance: Higher ISO may increase visible image noise or reduce retained detail, but the severity depends on the camera and exposure conditions rather than one universal ISO threshold.
For example, a stationary product photographed with controlled light and stable support may allow a lower ISO because the exposure requirements permit it, whereas a lower-light or less stable capture may justify raising ISO when shutter speed cannot be lengthened sufficiently.
The useful choice is therefore the lowest practical ISO that still satisfies the required capture conditions, not a fixed ISO number applied to every product photograph.
Balancing Aperture, Shutter Speed and ISO
Balance aperture, shutter speed and ISO by identifying the least-negotiable image requirement first, then adjusting the remaining controls around that priority.
If the required depth of field constrains aperture, the available shutter speed and ISO choices must compensate within the limits imposed by camera stability, motion and acceptable image noise.
If motion or stability constrains shutter speed instead, aperture and ISO carry more of the adjustment needed to reach the intended image brightness.
The workable balance is therefore conditional rather than a single setting combination that applies to every product.
The decision criteria are the required depth of field, camera stability or motion, acceptable image noise and intended image brightness.
Each criterion can become the priority when its consequence is less acceptable than the competing trade-off: insufficient product depth, movement blur risk, excessive noise or unsuitable brightness.
The image illustrates how aperture, shutter speed and ISO remain interdependent while the governing priority changes, without presenting a universal setting recipe.
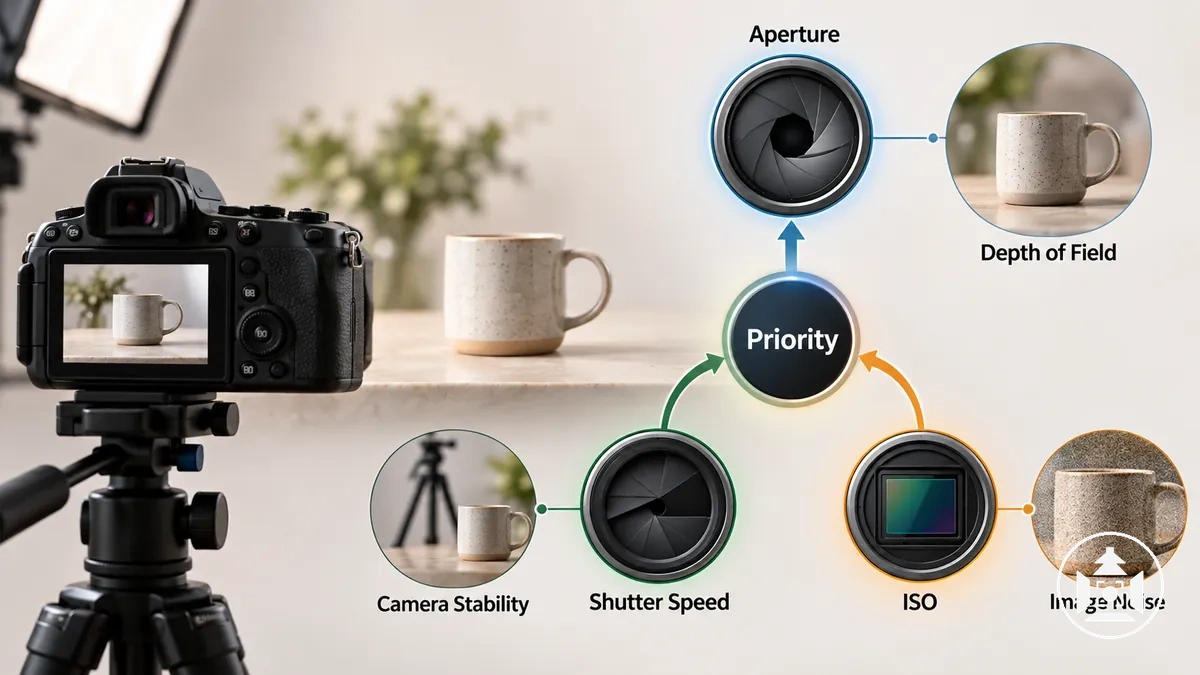
- Depth of field first: When sufficient front-to-back product sharpness is the least-negotiable requirement, constrain aperture to provide the needed depth of field, then compensate with shutter speed or ISO according to available camera stability, motion and acceptable image noise.
- Motion or stability first: When handheld capture or subject motion limits usable exposure time, constrain shutter speed first, then adjust aperture or ISO as the required depth of field and noise tolerance allow.
- Image noise first: When retaining detail with less visible image noise is the priority, constrain ISO to a lower practical value, then compensate with aperture or shutter speed only where the required depth of field and camera stability permit those adjustments.
- Image brightness: When the selected priority leaves the recorded image too dark or too bright, adjust the controls that still have acceptable latitude rather than overriding the requirement constrained first.
For a deep static product on a tripod, depth of field may take priority, allowing aperture to be selected for the required sharp coverage while stable support gives shutter speed more latitude and can reduce the need to raise ISO.
For a handheld product capture, camera stability may instead make a shorter shutter speed the priority, shifting the trade-off toward aperture, ISO or both while preserving the depth of field and image noise that remain acceptable.
These scenarios use the same three controls, but the governing condition changes which setting is constrained first.
Once the exposure controls have been balanced for the capture condition, decisions about lighting position, camera placement and other parts of the broader product photography setup belong outside this setting-selection step.
Those setup decisions can change the capture conditions, but they do not replace the priority-based method used to balance the three controls.
Focus Settings for Product Detail
Focus settings control how the camera acquires and maintains focus on the intended product detail.
Focus acquisition determines where focus is placed, while depth of field determines how much depth around that focus plane appears acceptably sharp.
A focus mode can therefore target or maintain a chosen detail, but it does not by itself make the entire product sharp.
Reliable sharpness depends on placing focus appropriately for the product geometry and keeping the focusing relationship sufficiently stable during capture.
The main local variables are focus mode, focus-point placement and whether the subject-to-camera distance remains stable.
Their roles differ: focus mode governs acquisition behaviour, the focus point or focus area identifies the targeted product detail, and distance changes can shift the required focus relationship or trigger reacquisition.
Keeping these variables distinct helps evaluate whether the intended product detail is being acquired consistently without treating focus settings as a substitute for depth of field.
- Focus mode: The appropriate focus mode depends on whether the product and camera remain stationary or their relative position changes; movement can require focus acquisition to update rather than remain fixed.
- Focus-point placement: The focus point or focus area targets the product detail that defines the focus plane, with product geometry determining how other surfaces sit in front of or behind that location.
- Subject-to-camera distance: When this distance remains fixed, the focusing relationship can remain consistent; when the distance changes, the camera may need to reacquire focus to keep the intended detail targeted.
Focus stacking is an advanced edge case when a single frame cannot provide the required depth of field: multiple captures focused at different distances can be combined to increase sharp coverage.
It does not change the basic role of focus settings, which is to acquire and maintain the intended product detail reliably under the capture conditions.
Choosing the Focus Mode
Choose the focus mode according to whether the subject-to-camera distance stays fixed or changes during capture.
A static product at a fixed distance can suit single autofocus or manual focus because focus does not need continuous reacquisition, while changing distance or movement can make continuous autofocus more useful.
Repeatability and the need for fine control also affect the choice, so no one focus mode is universally preferable.
- Single autofocus: Suits a static product and stable subject-to-camera distance where one focus acquisition can provide repeatable focus without continuous reacquisition.
- Continuous autofocus: Is useful when movement changes the subject-to-camera distance because the camera can continue reacquiring focus as that relationship shifts.
- Manual focus: Suits a controlled, stable setup when fine control and repeatability are required and automatic reacquisition is unnecessary.
Single autofocus and manual focus therefore suit a stationary product at a fixed distance when repeatability or fine control is the priority, while continuous autofocus becomes relevant when movement changes that distance and requires reacquisition.
For example, a static product photographed from a fixed camera position can remain at one focus distance, whereas moving the camera toward or away from the product changes the distance and can make continuous reacquisition useful.
Placing the Focus Point on the Product
Place the focus point on the product detail that must be sharp, then account for product depth and the available depth of field around that focus target.
The selected point establishes the focus plane, while product geometry determines where other important surfaces lie relative to it.
The appropriate focus-point placement therefore depends on the priority detail and the sharp area that the available depth of field can cover, rather than automatically using the nearest edge or geometric centre.
Verify the resulting sharp coverage instead of relying on a fixed placement formula.
For a deep product with important detail extending from its front surface toward the rear, place the focus target where the available depth of field can cover the required product detail rather than defaulting to one geometric position.
After capture, verify that the intended front-to-back sharp area falls within acceptable focus around the selected focus plane; if it does not, reconsider the focus-point placement or the available depth of field.
The method is to align the focus point with the required detail and product geometry, then use visual verification to confirm the result.
White Balance Settings for Product Colour
White balance is the camera setting that compensates for the colour of the illumination so neutral tones can be rendered closer to neutral and product colour can remain visually credible and repeatable.
The correction responds to the colour characteristics of the light rather than changing the product itself.
A suitable white balance therefore combines the illumination condition with an appropriate reference state so the resulting colour rendering remains consistent with the intended appearance.
The main attributes governing that correction are colour temperature, tint or neutral reference, and lighting consistency.
Colour temperature describes the warm-to-cool characteristic that white balance compensates for, while tint or a neutral reference helps address the remaining colour cast needed for a neutral rendering.
Stable illumination makes the selected correction more applicable across the shoot, whereas changes in the light source can change the correction required.
- Colour temperature: White balance compensates for the warm-to-cool characteristic of the illumination so neutral tones and product colour are not rendered with an unintended temperature-related cast.
- Tint or neutral reference: A neutral reference provides a known neutral target for evaluating colour cast, while tint correction can shift rendering along a different colour axis from colour temperature.
- Lighting consistency: When the illumination remains consistent, the same white-balance reference can support more consistent product-colour rendering across multiple captures.
- Repeatability: Keeping the illumination condition and white-balance reference consistent improves repeatability across a shoot; mixed light or changing light can require different corrections and make one setting less reliable.
Repeatability depends on keeping the lighting condition and white-balance reference sufficiently consistent between captures.
Under mixed light or changing illumination, different parts of the product or successive captures can be influenced by different colour characteristics, so a single white-balance setting may be less reliable.
White balance contributes to credible product colour by correcting colour cast from illumination, but it does not by itself determine complete product photo colour accuracy.
Broader colour accuracy also depends on factors outside this in-camera white-balance section.
Auto, Preset and Kelvin White Balance
Auto white balance, preset white balance and Kelvin differ in how the correction is established and in how much consistency and repeatability the photographer retains under a given lighting condition.
Auto white balance estimates a correction from the scene, preset white balance applies a predefined correction intended for a named lighting condition, and Kelvin lets the photographer set a colour-temperature value directly.
Their practical fit changes with lighting stability, because convenience can matter more under changing light while repeatability can matter more under controlled light.
The comparison uses the same criteria for all three modes: how the correction is set, the lighting condition it suits, its repeatability and its main limitation.
This common basis shows how the control method affects convenience and consistency without treating any mode as universally preferable.
| Mode | How correction is set | Best-fit lighting condition | Repeatability | Main limitation |
|---|---|---|---|---|
| Auto white balance | The camera estimates and applies the correction automatically from the scene. | Changing or less controlled lighting where convenience is important. | Can vary between captures because the camera may estimate the scene differently as conditions or framing change. | Consistency may be lower across a series when the automatic estimate shifts between images. |
| Preset white balance | The camera applies a predefined correction associated with a general lighting category. | Lighting that reasonably matches the preset's intended condition and remains relatively stable. | Can provide consistent settings across captures when the same preset is retained under consistent light. | The preset is an approximation and may not match the actual illumination closely enough for the intended rendering. |
| Kelvin | The photographer sets a colour-temperature value directly rather than relying on an automatic scene estimate. | Controlled or stable lighting where the photographer wants to retain the same colour-temperature setting across captures. | Provides repeatable setting application when the same value and lighting condition are maintained. | A manually selected value can still be inappropriate for the actual illumination and does not by itself account for every colour shift. |
In controlled lighting, preset white balance or a manually chosen Kelvin setting can support consistent correction across a series because the lighting condition is stable and the selected setting can remain unchanged.
Under changing light, Auto white balance may offer greater convenience because the camera continues to estimate the required correction, although that can reduce repeatability between captures.
Kelvin is not inherently more accurate than the other modes; its main distinction is direct control over the colour-temperature setting when the photographer can judge and maintain an appropriate value for the lighting condition.
Custom White Balance for Controlled Lighting
Custom white balance establishes a repeatable in-camera reference from a neutral reference under the actual working light used for the product shoot.
The method links the reference target to the current illumination so the camera can apply a correction suited to that lighting condition.
When the working light remains stable and the reference is appropriate, the custom white balance can support greater repeatability in neutral tones and product colour across captures.
Verification is required before treating the setting as repeatable.
- Place or capture an appropriate neutral reference under the same working light and illumination conditions used for the product.
- Register or select that neutral reference as the in-camera reference using the camera's custom white-balance procedure.
- Apply the custom white balance to the product captures while maintaining the referenced working illumination.
- Verify that neutral tones and product colour are rendered consistently before relying on the setting for repeatability across the shoot.
A material lighting change requires the custom white balance to be reassessed; establish or verify the neutral reference again under the changed working light.
Custom white balance can support consistency under stable conditions, but it does not by itself guarantee complete colour accuracy.